Can you create timesheets effortlessly, without switching multiple apps? Are you tired of chasing down tasks and projects and never knowing what you've worked on?
Discover how you can simplify timesheets while working on your favorite Microsoft 365 product, by using the Timeneye time tracking software. This guide will show you how to add Timeneye to Microsoft 365, and how to track time for projects, tasks, and meetings, so you'll never be late for submitting your timesheets again.
Why use Timeneye for timesheets in Microsoft 365?
Timeneye is the easiest way to track time in Microsoft 365 products without having to switch multiple apps. It also allows you to automate the submission and approval process, ensuring that no one overlooks their time tracking chorse and managers are spared the hassle of constantly reminding and following up with their team members.
Spreadsheets, like Excel, can indeed be used to create timesheets. However, as the number of tracked time entries grows, spreadsheets can quickly become cluttered, confusing, and hard to manage. Moreover, they fall short in providing a clear visual representation of your time usage.
With a time tracking tool, you can register time and visualize that time against the projects and clients you work with. Time data is securely stored in the cloud and aggregated into reports and insights that are simple to access and share.
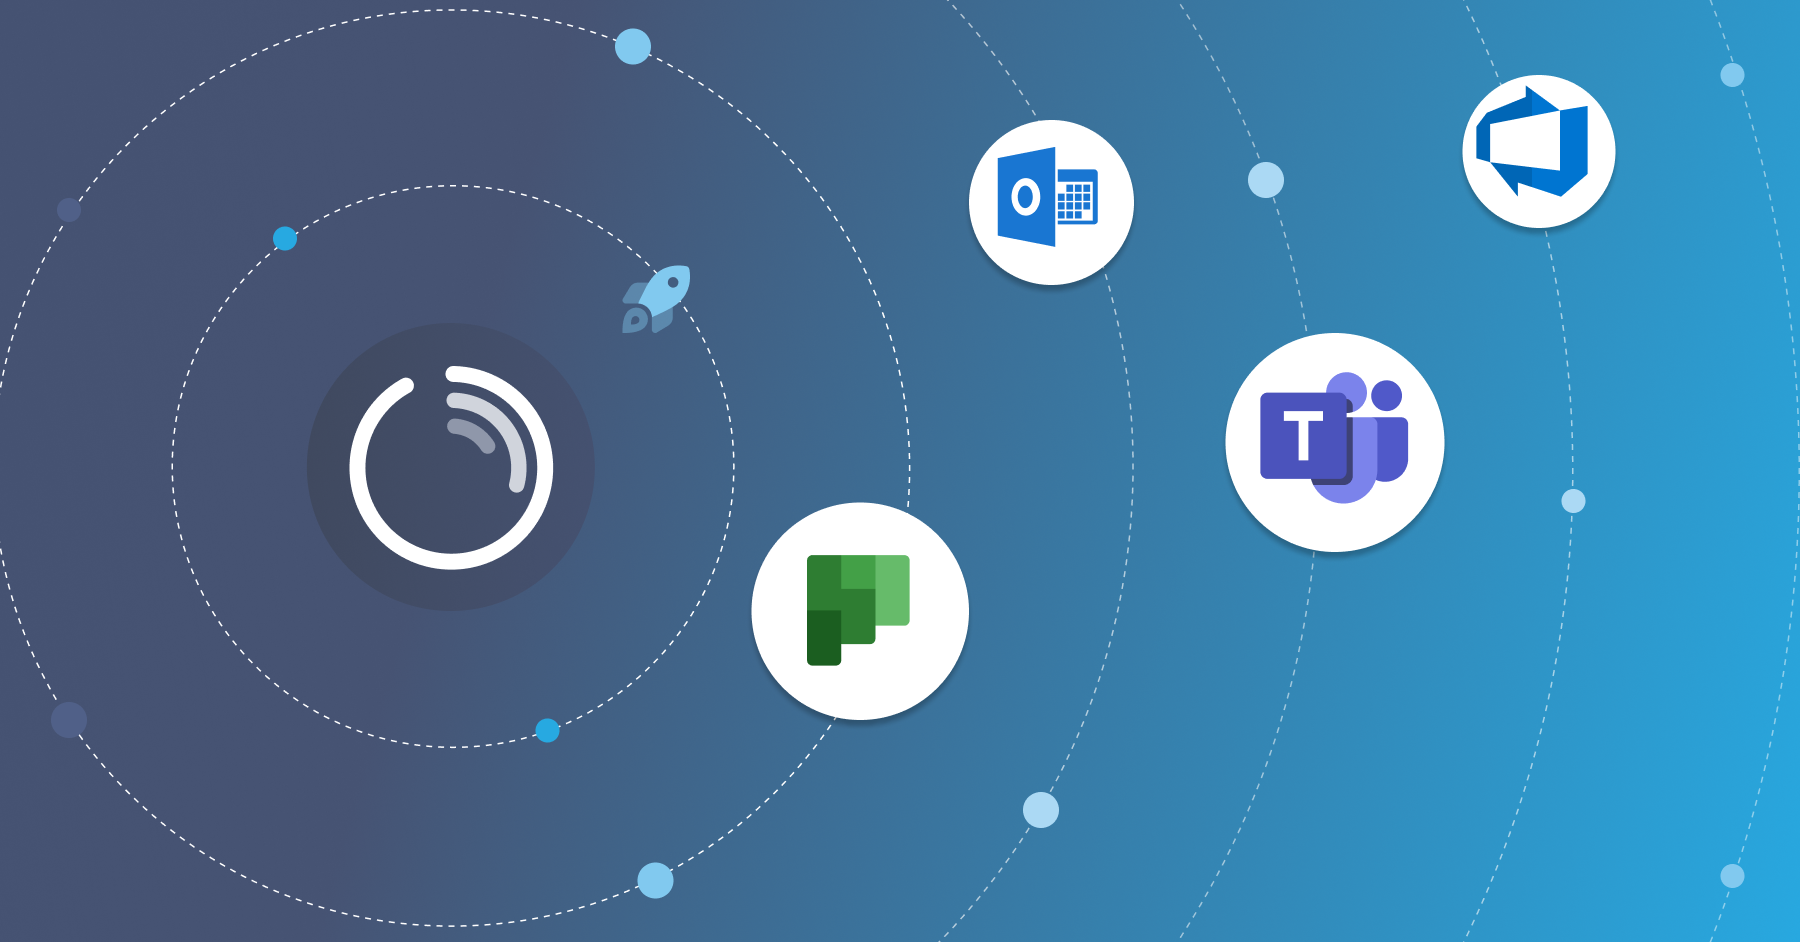
One of Timeneye's standout features is its seamless integration with Microsoft 365, which sets it apart from other time tracking tools. This compatibility not only simplifies the implementation process but also ensures scalability across the entire organization, making time tracking more efficient and user-friendly.
Getting started with Timeneye in Microsoft 365
To get started, you will both need a Microsoft 365 account (obviously!) and a Timeneye account. Just sign up to Timeneye (if you're not convinced, you can test it for 14 days, for free, or request to see a live demo).
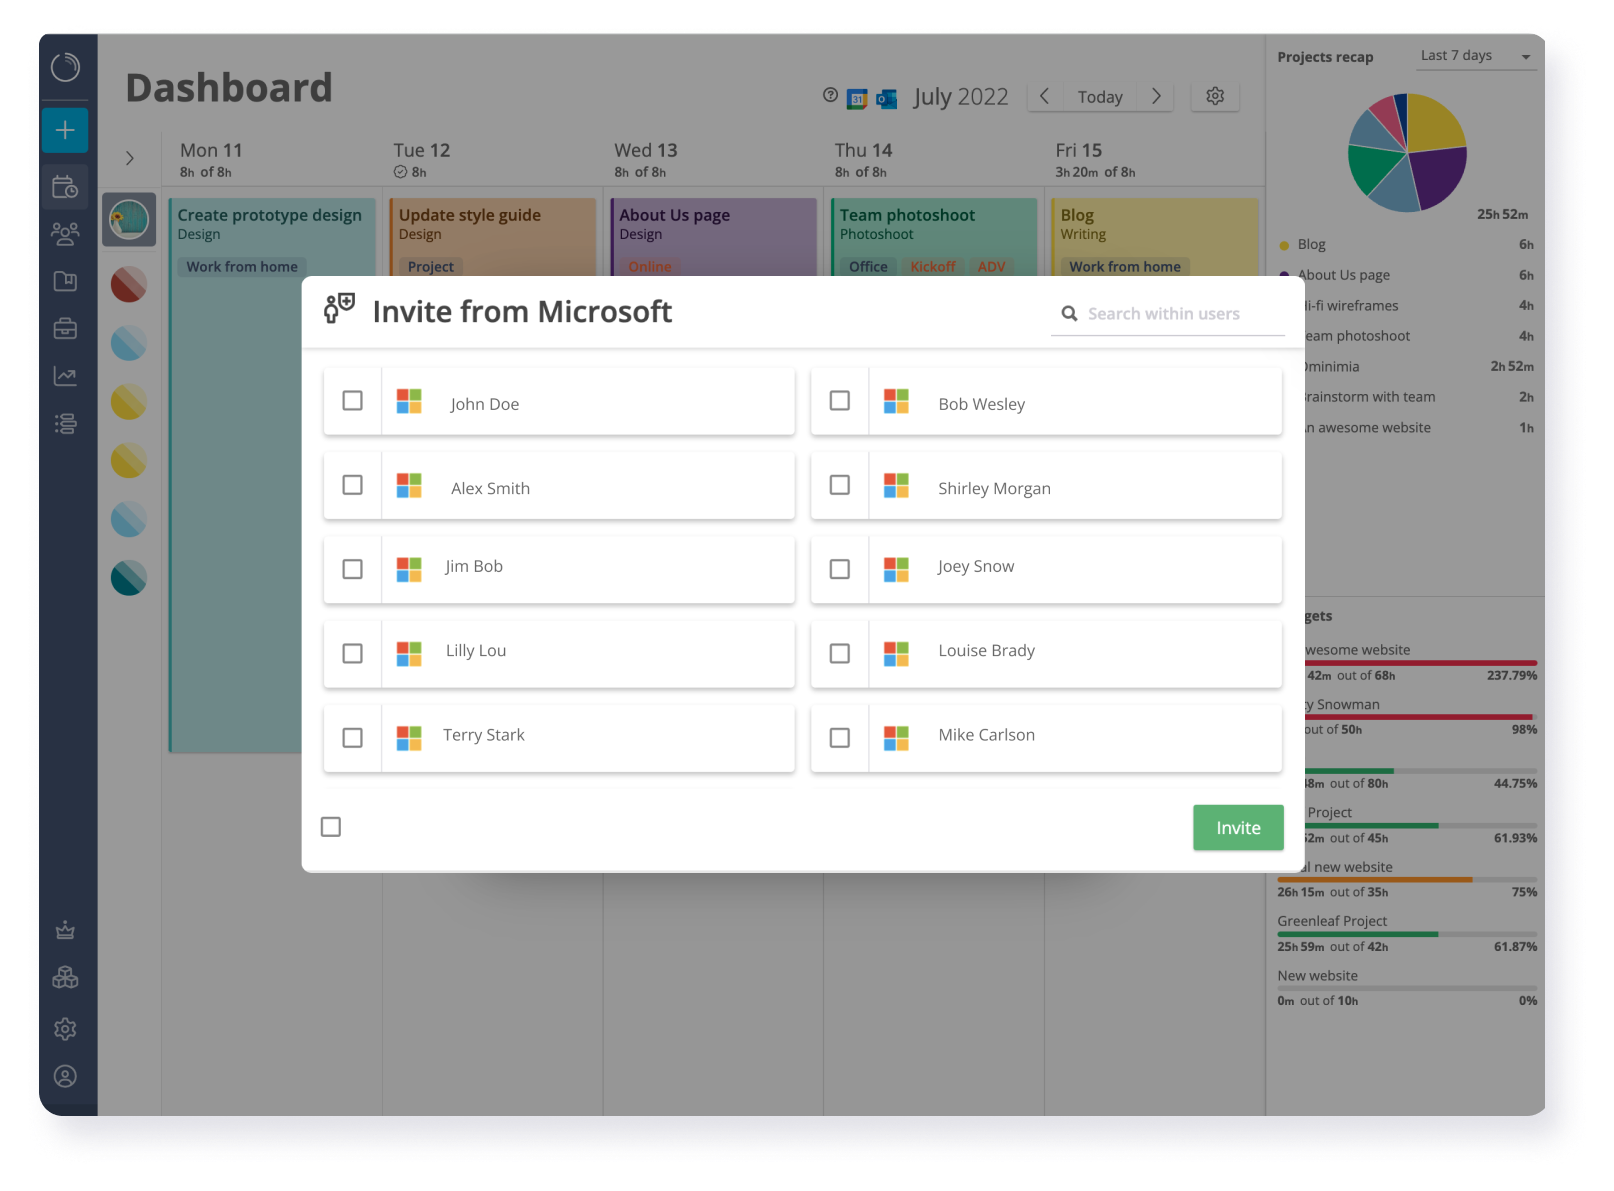
Looking to onboard your entire team effortlessly? Timeneye offers a feature to import all your colleagues' Microsoft accounts at once. During the Timeneye setup process, simply select the accounts you wish to add, and each team member will automatically receive an invitation link. Whether you’re importing 2, 20, or 200 accounts, the process is quick and efficient.
As you set up Timeneye you'll be asked to create your projects too. We recommend doing it, however, there are easier ways to import all your projects and clients from Microsoft 365, which we'll see in a later paragraph.
Maximizing productivity with Timeneye in Microsoft 365
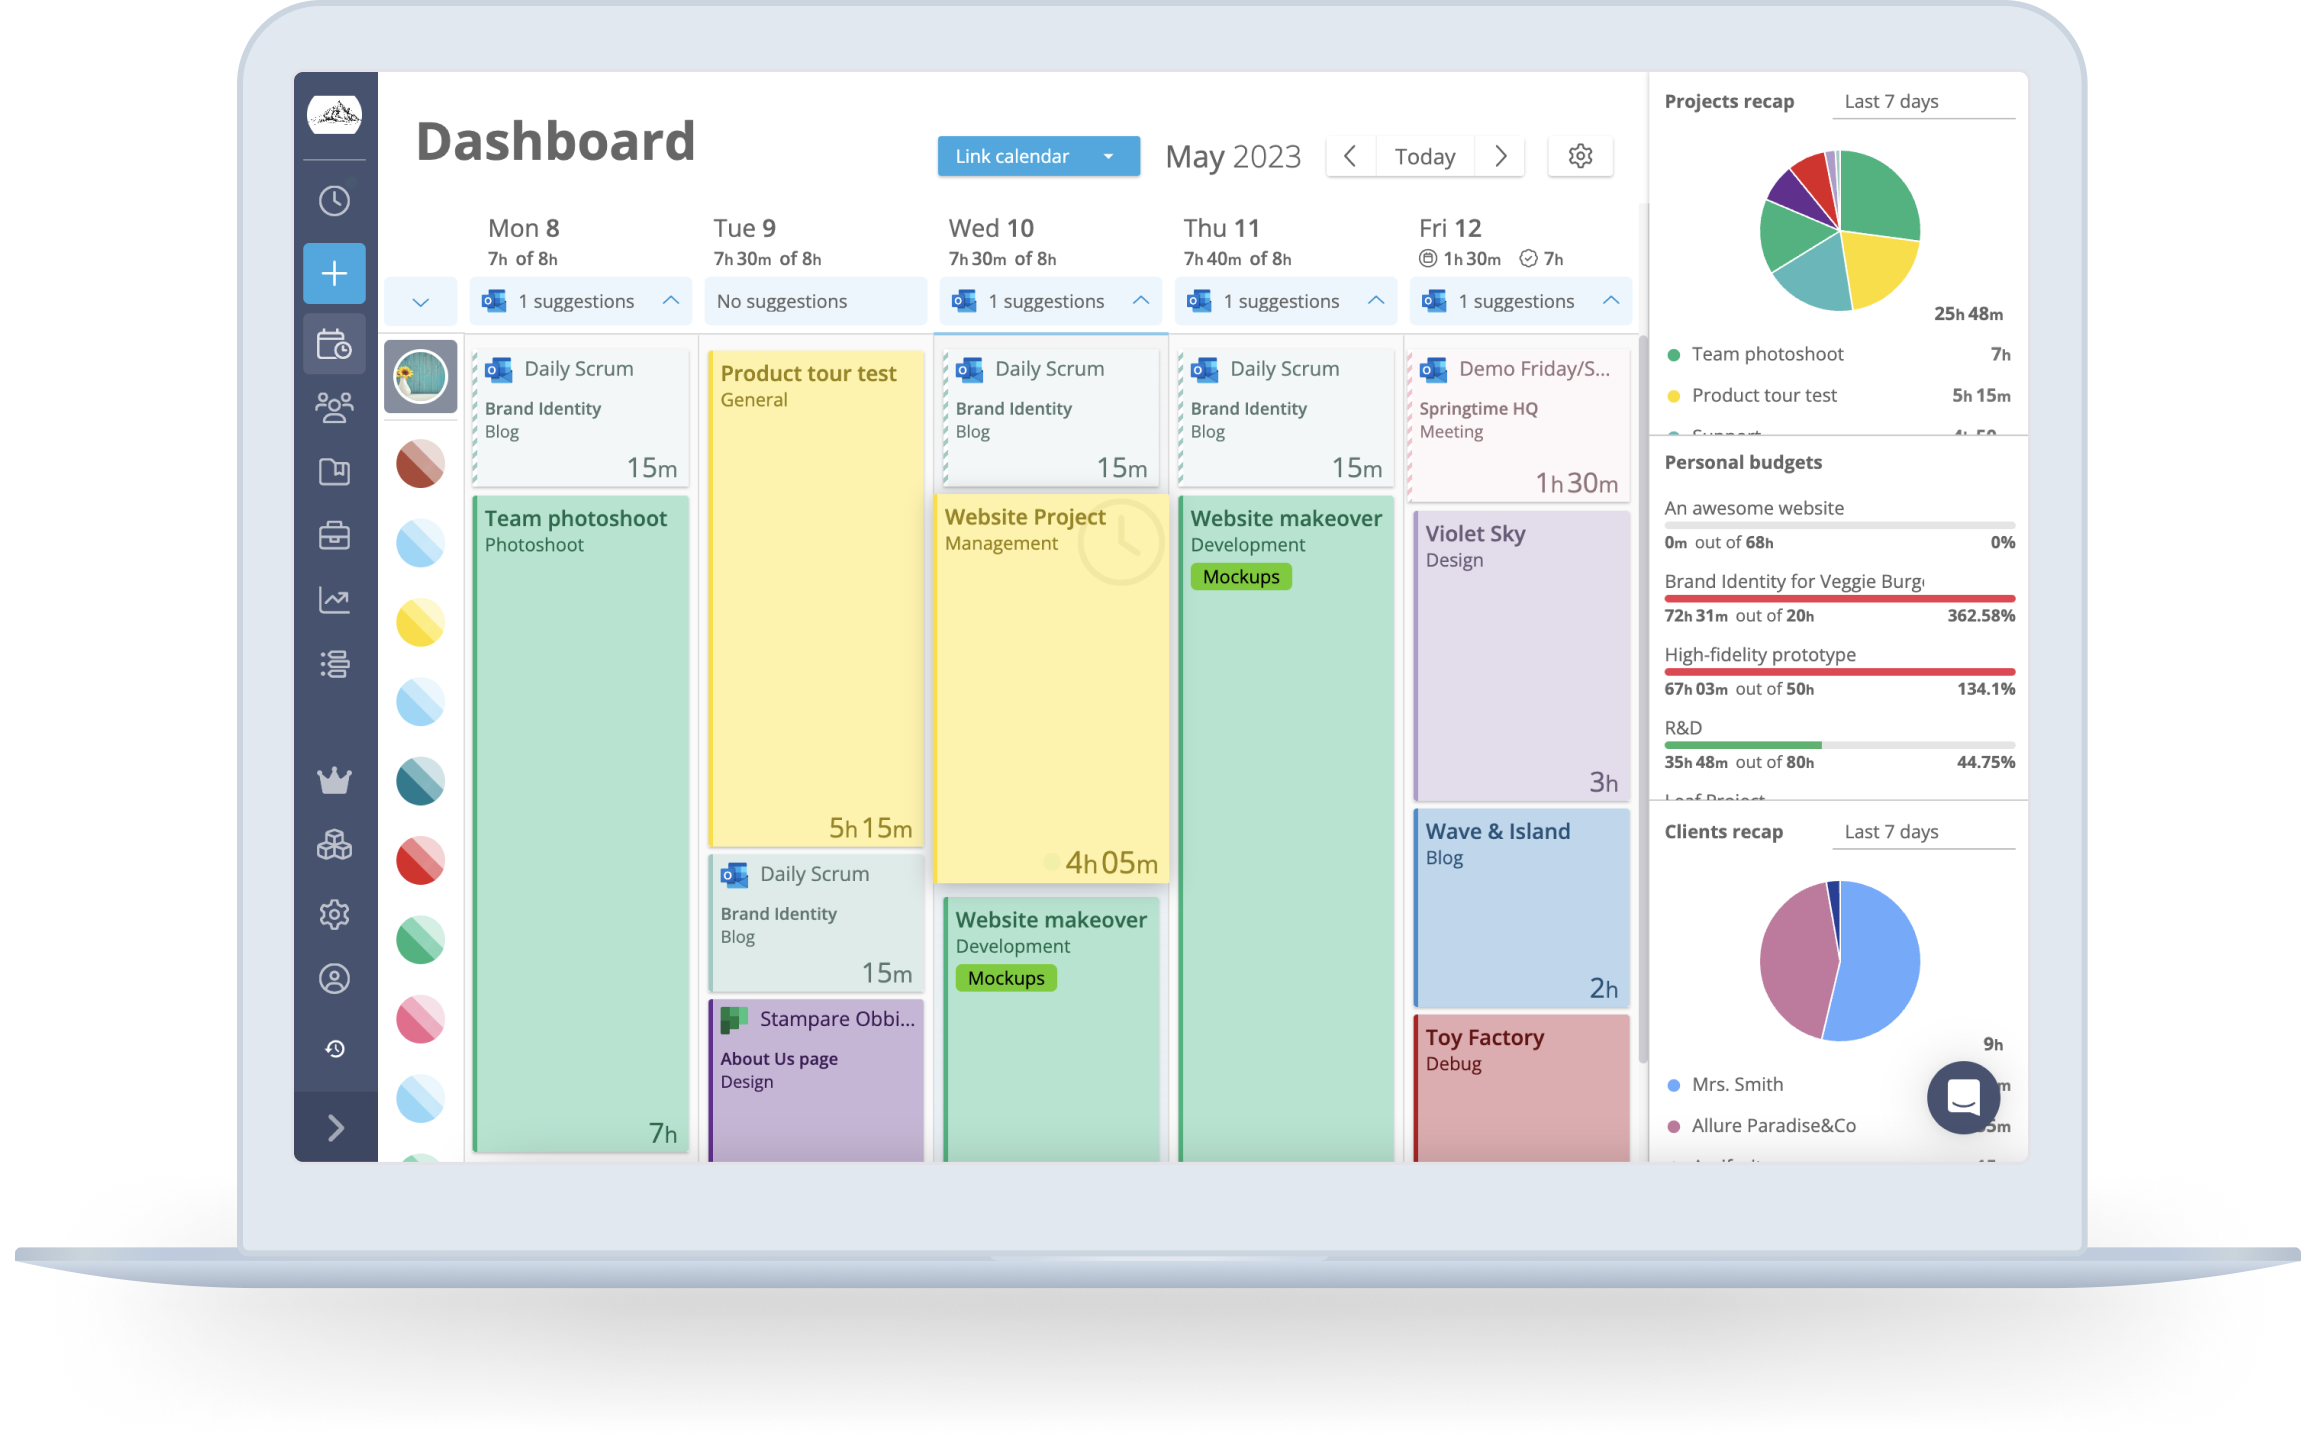
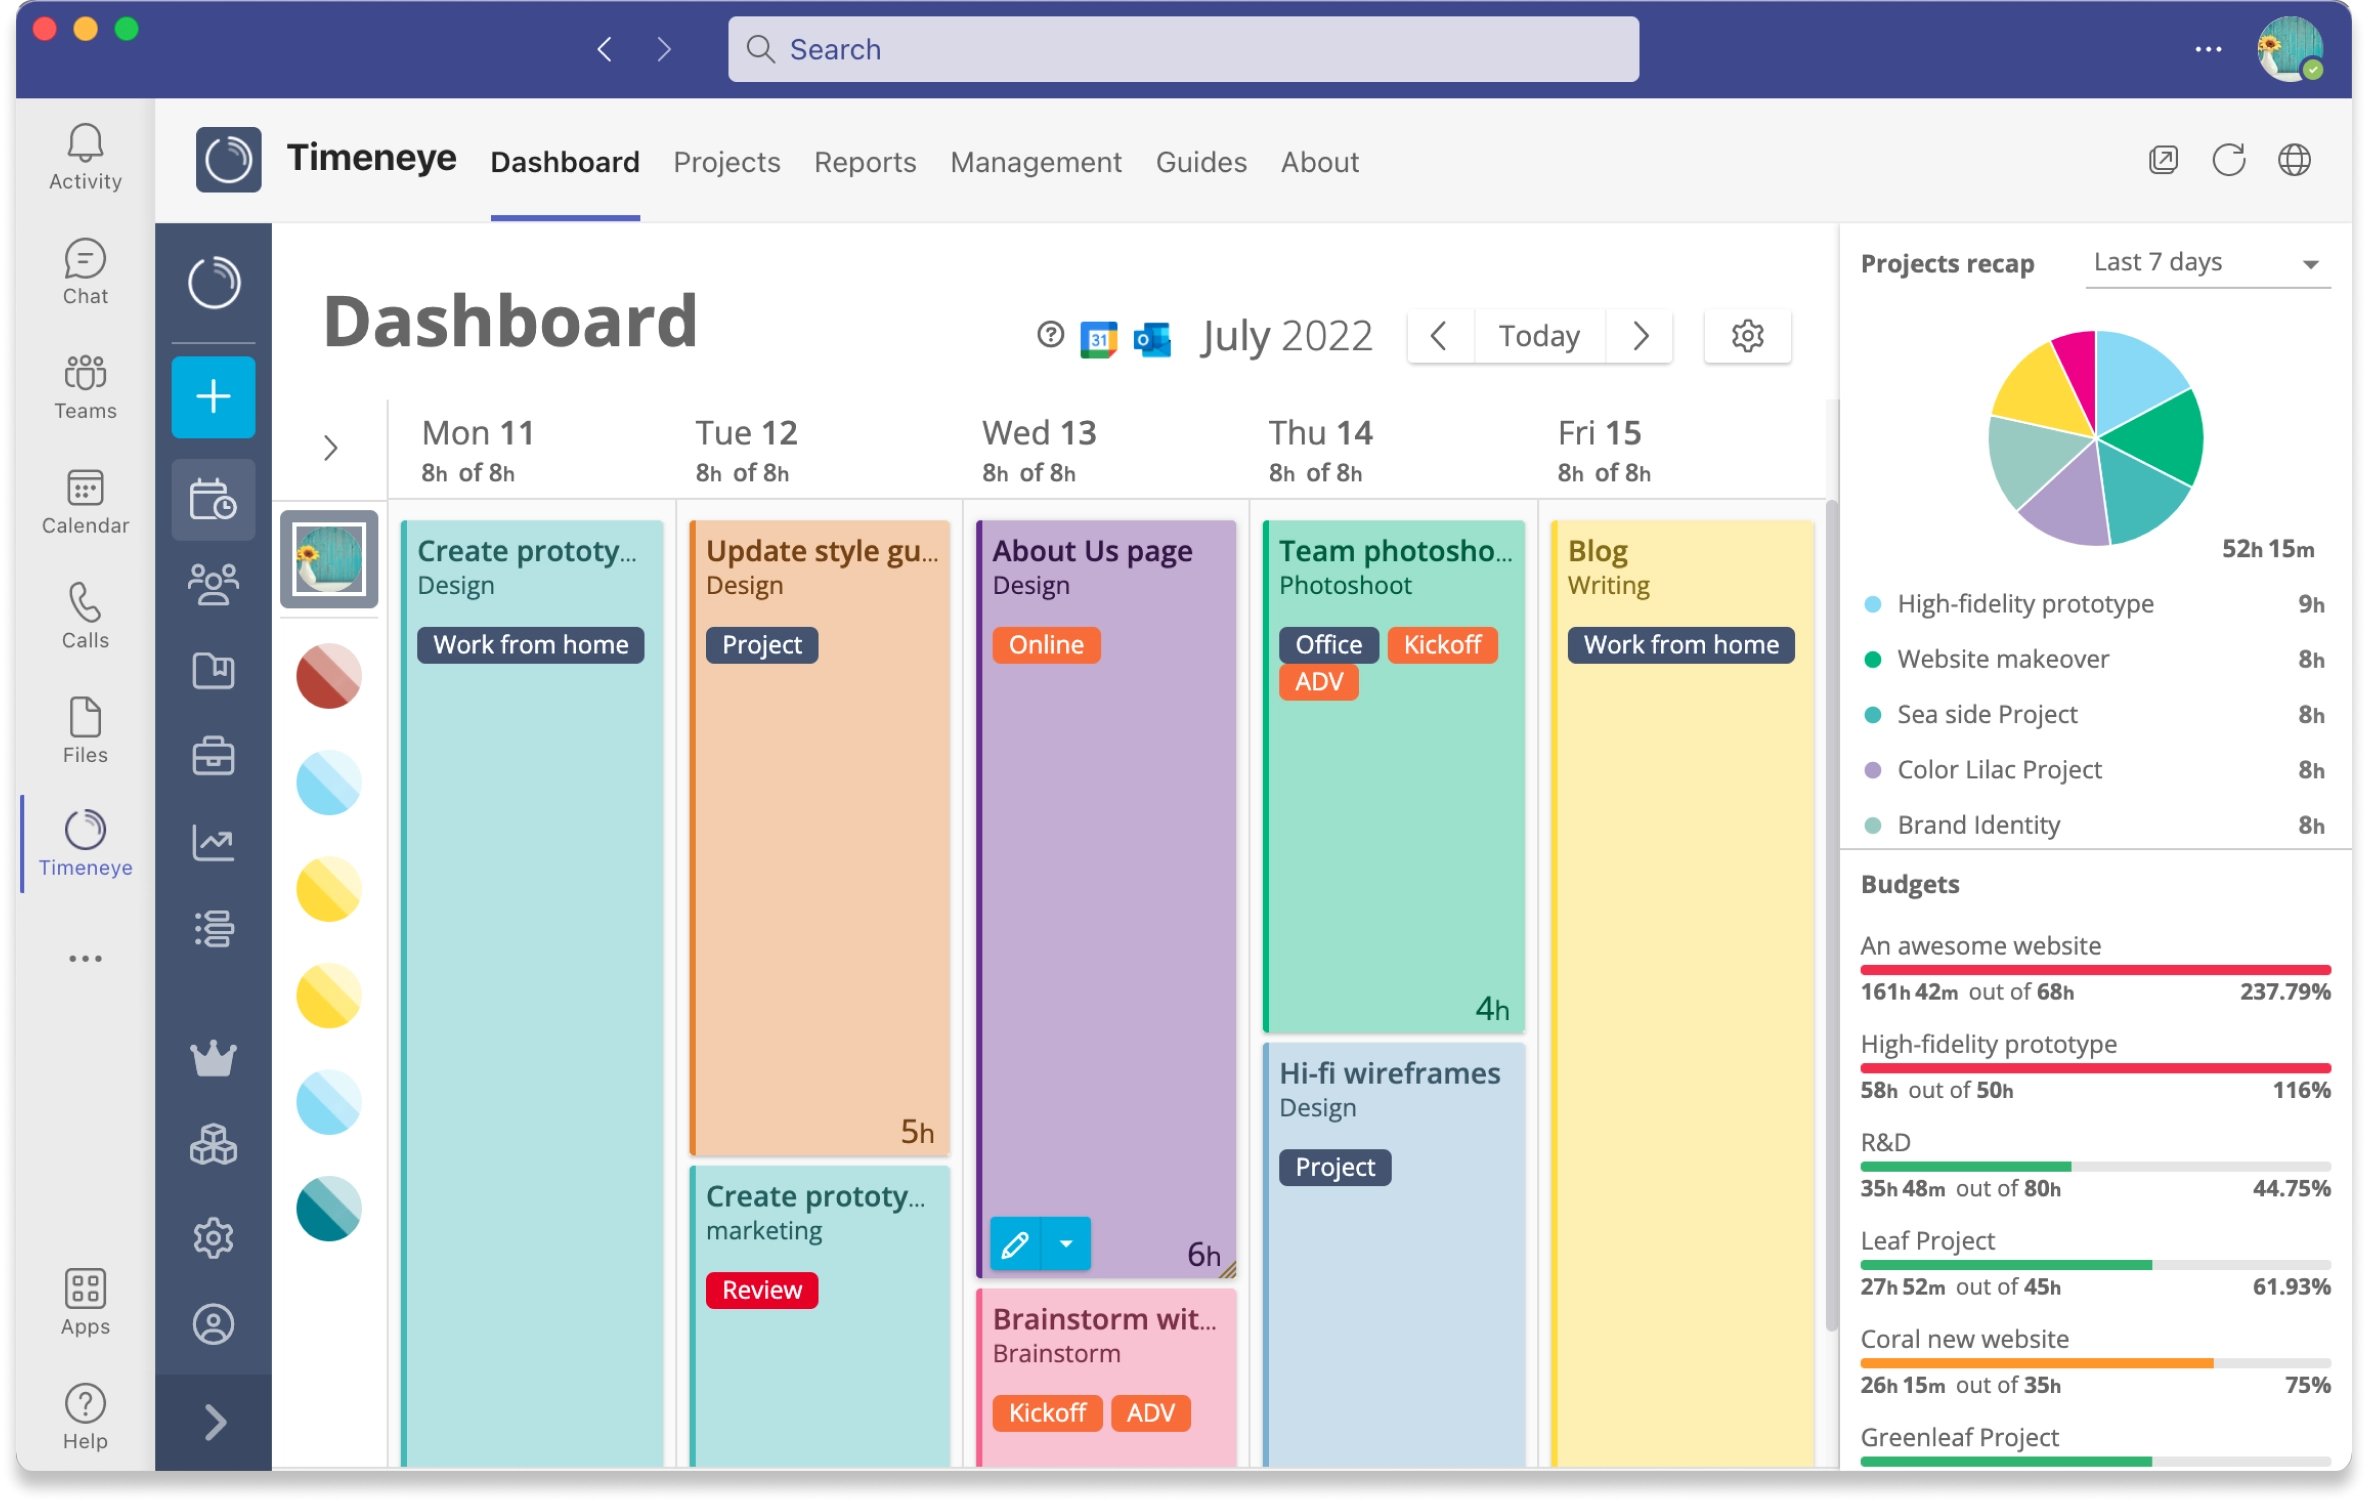
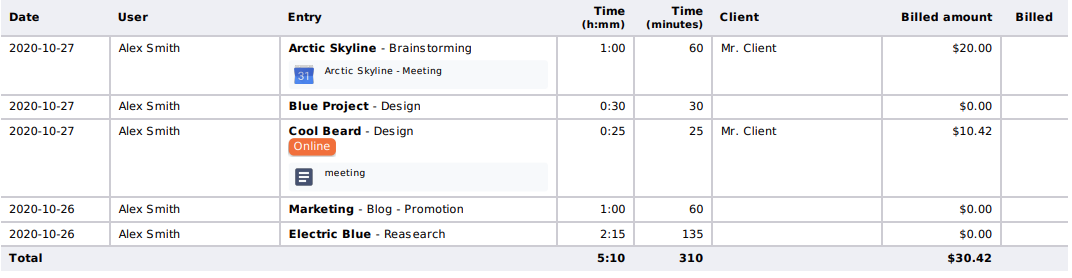
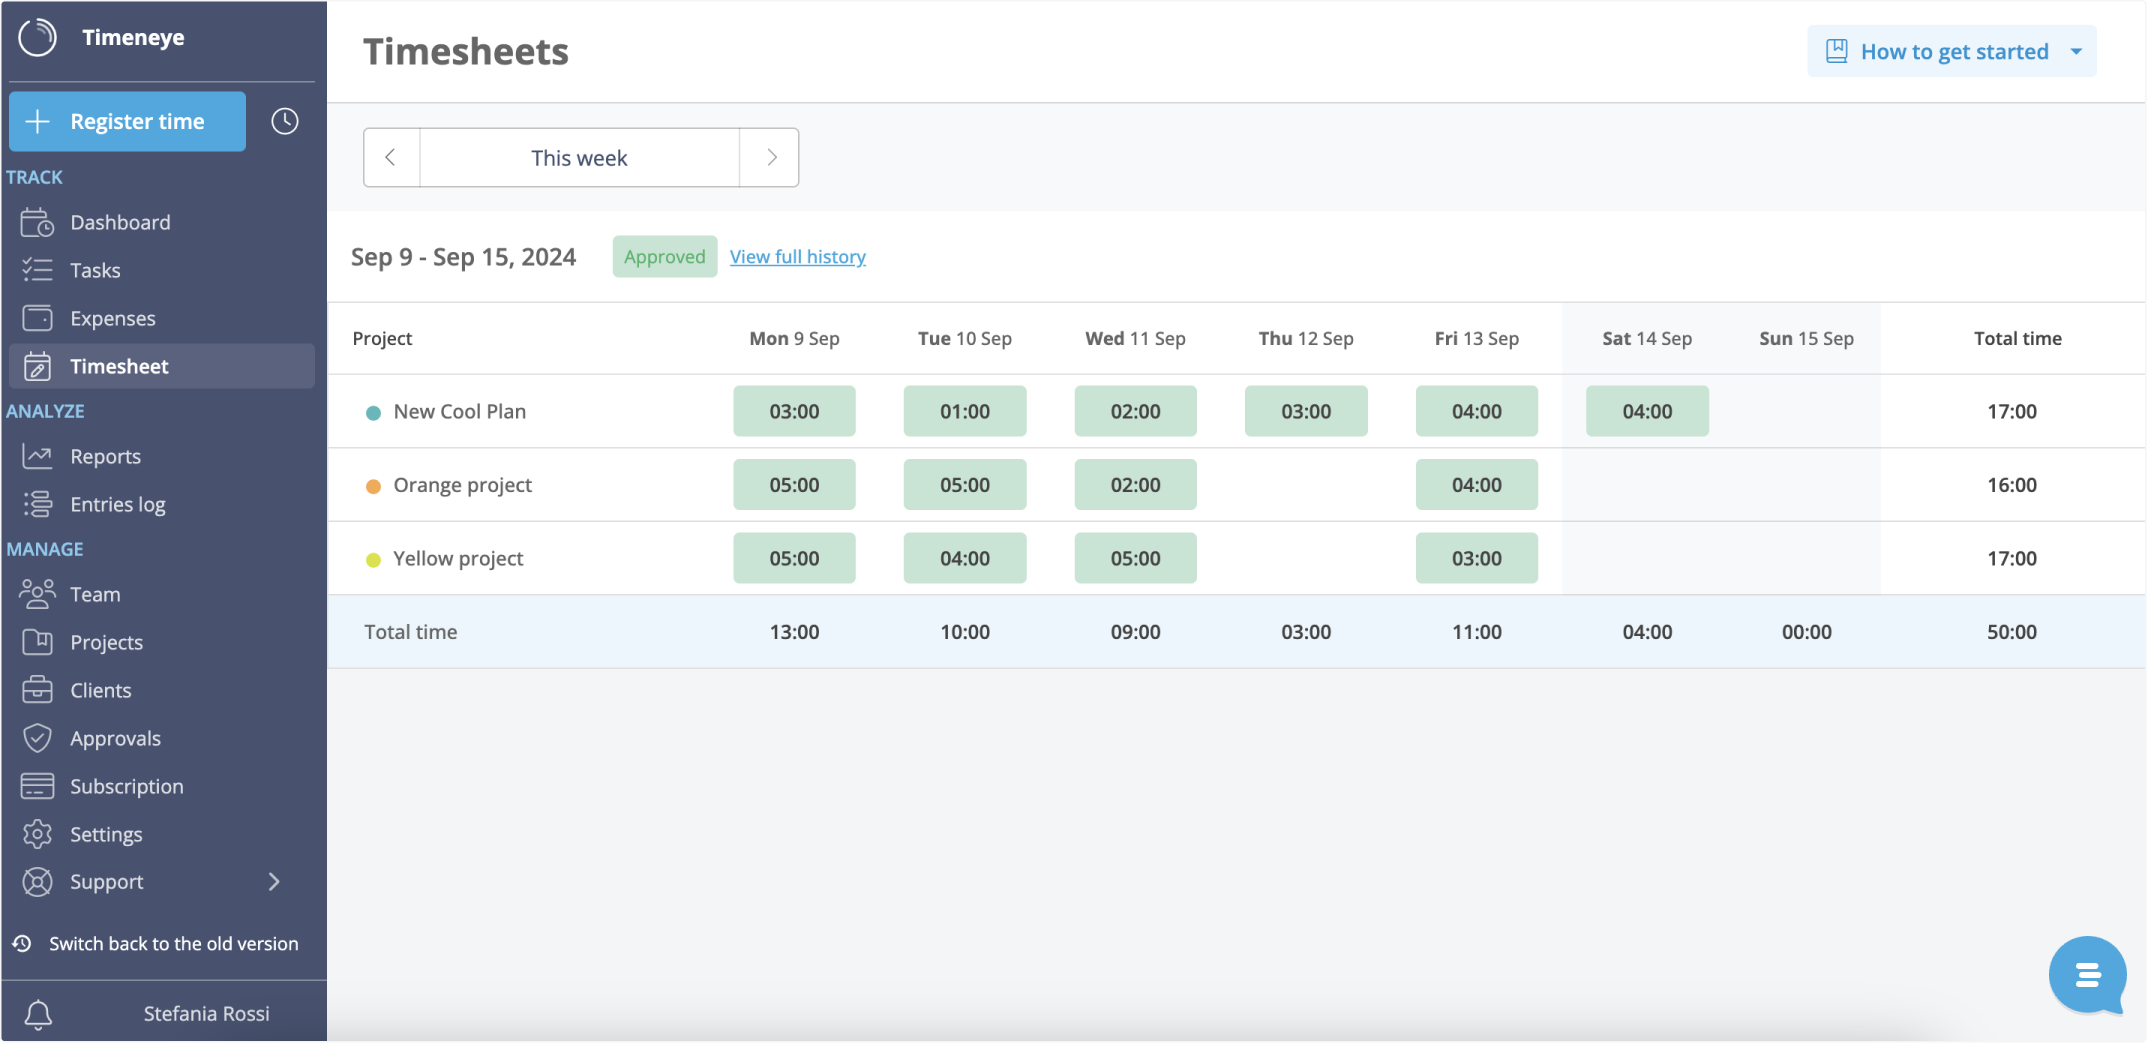
Once you've set up your Timeneye workspace, you can track time and create your timesheets. Every minute you track will be associated with a project (and a client if you need it), so you won't risk having half empty, or unclear timesheets.
What you have to do is make sure that:
- you're connected to the software you use daily. By staying connected, you can seamlessly integrate Timeneye with your favorite Microsoft 365 products and track your time there. This eliminates the need for switching between multiple apps and ensures that every minute of your work is accurately recorded;
- you have set up all the workflows so that you can accurately categorize your time, to eliminate any ambiguity or confusion. This includes setting up projects, clients, and tags clearly in Timeneye, to reflect every aspect of your daily work;
- constantly keep an eye on AND review your timesheets to be ready to share them with management and the rest of the team. You wouldn't want to rush and fill your timesheets last minute, or make mistakes that would be long and cumbersome to fix.
Connecting time tracking with Timeneye and Microsoft 365 products
To reduce tab switching and improve accuracy, you can connect Timeneye to the Microsoft 365 tools you're already using.
You can seamlessly integrate Timeneye with the following Microsoft 365 tools:
We won't go into the detailed steps you need to do to set the integrations - check out this detailed guide instead.
What you have to know is that, thanks to these integrations, you can include in your timesheets all the tasks, to-dos, meetings, and events that you have scheduled in your Microsoft 365 tools.
- By adding Timeneye to Microsoft Teams, you can track time and add entries to your timesheets directly from the Teams desktop app;
- With the integration of Timeneye and Microsoft Planner, you can include all your assigned tasks and projects in your timesheets;
- The Microsoft To Do integration allows you to include all your work-related to-dos;
- By linking Timeneye with Outlook Calendar, you can include all your meetings and events in your timesheets. This integration ensures that you accurately track the time spent in meetings, whether it's a client meeting, a team briefing, or a project presentation.
- Lastly, the integration with Azure DevOps enables you to include all your development tasks and activities in your timesheets.
Setting up projects, phases, and tags to categorize your time
Every minute in Timeneye must be assigned to a project and a phase. You can automatically import your Microsoft Planner projects, for example, and you'll be ready to start tracking time right away.
Or you can create brand new projects, it doesn't matter. You'll also have to create what Timeneye calls Phases to break down projects into smaller steps.
Examples: a project called “Marketing” can have phases like “Social Media” or “Email Marketing”, or “Market Research”; if you build an app, the phases can be “App 1.0”, “2.0”, and so on.
Tags, on the other hand, allow you to assign labels to your time entries, making it easier to identify and categorize the activities in your timesheets. By using tags, your timesheets will be accurate and tidy, with no gaps or inaccurate logs in the hours recorded.
Submitting timesheets with automated workflows
Timesheet approvals and an approval workflow provide users with an easy and, when needed, automated way to submit and approve timesheets.
When users log their time daily, their timesheets compile automatically. In the Timesheet section, users can effortlessly edit and review their timesheets before submission. Managers overseeing the approval process can then seamlessly review, approve, or reject time and expense submissions. Automated notifications and email reminders make sure that no one misses their deadlines. Additionally, managers can fully automate the approval process with options for bulk submission and bulk approval of time and expenses.
By integrating all the Microsoft tools outlined above, you'll ensure that every time entry is seamlessly included in your submissions.
Sharing and exporting timesheet data
In the Entries section, manager can see and review every single entry you create. There's also a specific filter (the Notes and Integration info filter) that will let you sort out entries by the integrations you've utilized to create them. This means you can quickly see how many events from Outlook Calendar, or To Do for Microsoft To Do you have tracked.
You can edit and fix any mistakes in your timesheets, and if you need to, you can export them to PDF or CSV.
These data exports are also available in the Reports section. To further minimize manual work, you can set up automated exports to be sent to your email at your preferred frequency.
For more advanced data analysis, integrate Timeneye with Microsoft Power BI. This will enable you to delve deep into your time data, discover productivity patterns, and identify areas for improvement.
Best practices for deploying Timeneye for timesheet management
- Start by signing up for a free, 14-day trial. Alternatively, request a free demo to see the tool in action and consult with our productivity experts. They will demonstrate the simplest methods to seamlessly integrate Timeneye into your existing workflow;
- If you signuo for a free trial, full advantage of the trial period: use the software daily, set it up with your team, connect all the integrations, and see how it works;
- Integrate Timeneye with your Microsoft 365 tools;
- Start testing Timeneye as a small pilot for a few people, and then scale it to a bigger time (or to the whole company). We have written an extensicìve guide on how to deploy Timeneye to your whole team to help you out!
- Monitor the team's usage and gather feedback throughout the trial: don't be afraid to test, get feedback, and repeat.
Conclusions
To sum it up, Timeneye's seamless solution for time tracking in Microsoft 365, makes it easier to create timesheets, eliminating the need to switch between multiple apps.
By connecting Timeneye to various Microsoft 365 tools, such as Microsoft Teams, Microsoft Planner, To Do, Outlook Calendar, and Azure DevOps, you can track time for tasks, meetings, and projects directly from these platforms.
Whether you're an individual or managing a team, Timeneye provides the necessary features to categorize and organize your time effectively.