“How long will it take?”
Any client who will come seeking your business’ services will be concerned about time as well as costs. This is why time is a key factor when quoting a project.
Once you’ve given an estimate, the hard part is sticking to it. Exceeding the budgeted time can result in high costs and very upset clients: here’s how Timeneye helps you avoid just that.
Working on hourly budgets
The amount of time it will take to complete a project and the costs are strictly related.
This is why many projects in the marketing and development industry are often quoted in hours. Not to mention that sometimes the business might decide to work on retainer agreements, with work performed on a regular basis every month.
When a project exceeds its scope it also almost always go off-budget, resulting in overworked staff, spikes in costs, angry clients and (very) stressed workers.
Tracking time while working on a project will make sure you don’t end up in those scenarios.
5 Timeneye features to help you stick to your budgets
#1 Create an all-time budget for your project
First, make sure to create an hourly budget in your Timeneye projects.
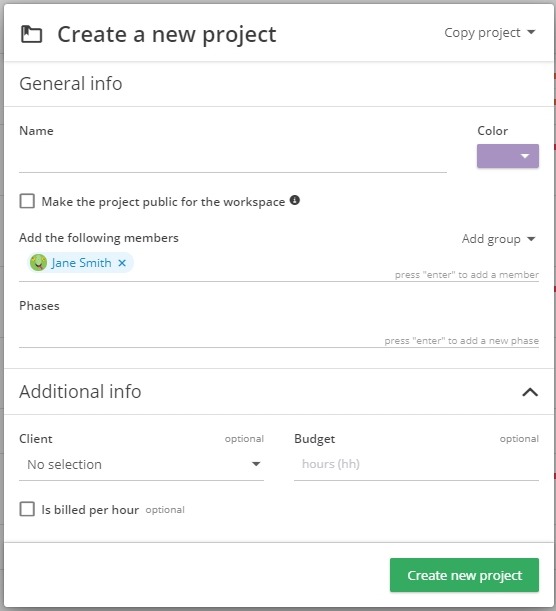
When you add a new project in Timeneye, you’ll find a Budget field in the Additional Info section.
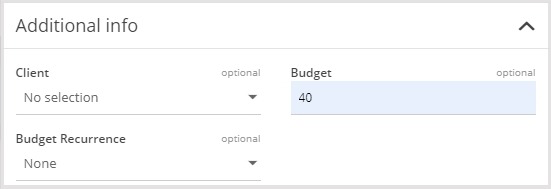
Here you can set the total budget for the project. This works best for one-time projects or project that have a defined start and end date. To make sure the budget doesn’t reset (see below), set the Budget recurrence to “None”.
#2 Work on recurring budgets
If you set the budget recurrence to “None”, you’ll end up with one budget for the whole project, as explained above.
But you can also set weekly or monthly budgets depending on the agreement with the client: if you agreed to take on regular work you have to perform every week/month, you should use this type of budgets.
So when you create the Project, in the Budget recurrence fields look for the options available other than “None”:
– If you select weekly, the budget will reset on a day of the week of your choice.

– If you set it to monthly, it will reset every month on a day you set.

You will need a PRO plan to use the recurring budgets
#3 Split the budgets into projects and phases
How can you be sure the hours are equally distributed among all the activities?
Once you’ve set up your budget, you should also distribute it across your resources and phases.
In Timeneye, you can assign part of the budget to phases or team members. Go into the Project edit mode, and access the Phases tab.
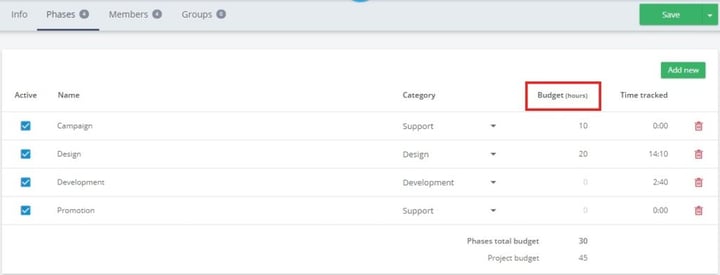
In the Budget column, you can assign the hours. Make sure the end sum of the hours matches the budget you have set for the project. If you don’t you’ll receive a warning from the system.
The same can be done for team members. All your team members will likely perform different parts of the work, so you have to make sure everybody stays on budget and the project does not take up too many hours.
#4 Check recaps and progression bars
Keeping an eye on the budgets while the work proceeds will avoid any nasty surprises.
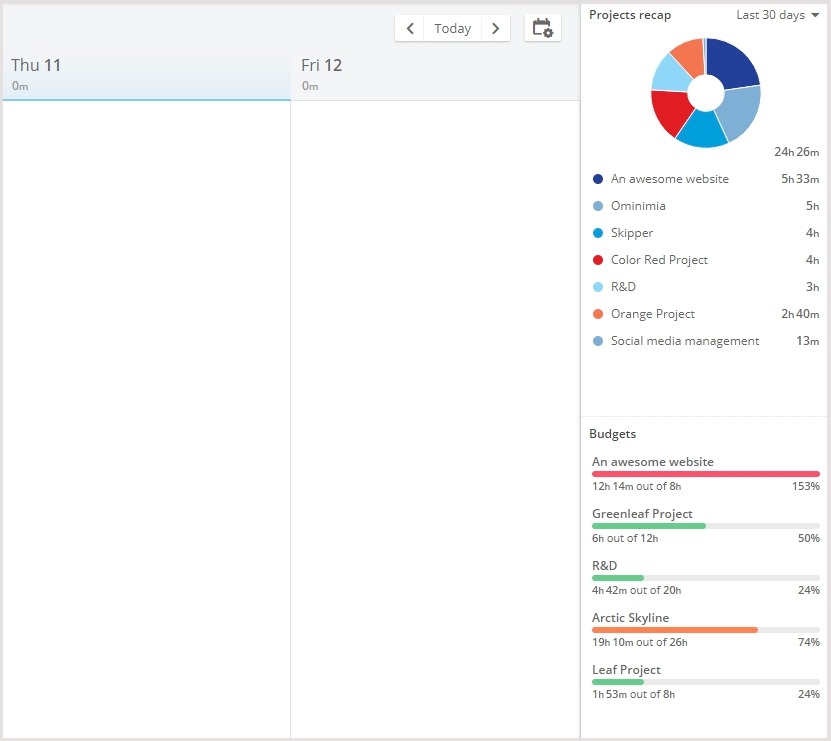
The Projects view in Timeneye already has a progress bar under the budget column. You can also see it when clicking on the project and accessing the Project status.
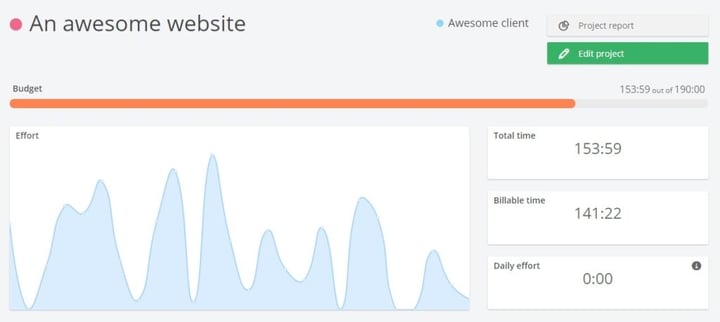
Budget recaps also show the same progression, only this time directly on the dashboard: a very useful way of keeping an eye on the work and seeing how it’s going at a glance. One thing though: the Budgets recaps on the dashboard only show a user’s personal budget (if you have set one as explained in #2)
#5 Watch out for notifications
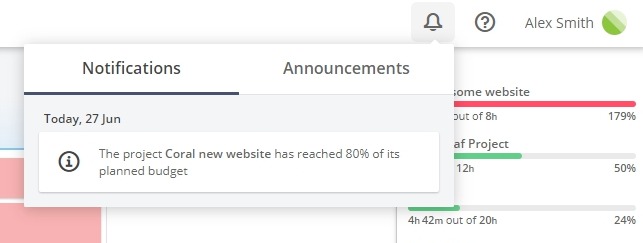
This time you won’t have to set up anything. The system already automatically sends you notifications when the project reaches 80% of the budget, or it surpasses 100%.
Are your projects going well? Track your time with Timeneye and find out!